Pages

Tuesday, May 17, 2011

Mocha Protein Shake!

I know a lot of you out there drink protein shakes/smoothies for breakfast. I do too, when it's warm outside. Lately, I've been doing an actual strength-training rountine in addition to my regular cardio and I've been making a conscious effort to get plenty of clean-burning, efficient, plant protein in my diet. I'm not gonna lie, I've been reading this one magazine that has awesome articles and sample routines, but it really pushes the whey protein (which totally grosses me out). Blech. But anyway, I was browsing protein shake recipes on their website and I saw one for a "java shake". Java... hmmm... The shake itself was inedible (made with cottage cheese!), but the instuctions called on your to make up a batch of coffee and then freeze it in an ice cube tray to add to your shake.

Could this possibly be the most awesome breakfast shake idea EVER?

I immediately brewed a batch of strong coffee, let it cool, then poured it in an ice cube tray to freeze. Meanwhile, I thought about the rest of the ingredients for my shake, and I decided I wanted to make this one a mocha (coffee + chocolate) protein shake. The next morning, I popped all the ingredients in the blender and then danced around the kitchen in success. It was awesome. Awesome and almost 30 grams of protein. It was also just like an iced mocha (haven't had one in years!). Feel free to play with this a little to suit your specific tastes.

Mocha Protein Shake:
1 c. strong brewed coffee
1 (6 oz.) container unsweetened, plain soyogurt
1 scoop chocolate protein powder (I use Lifetime Life's Basics Plant Protein)
1 tsp. cacao nibs (optional, but makes it chocolate chip-y!)
1 tsp. cacao powder
1 capful vanilla extract (about 1/4 tsp.)
1/2 c. unsweetened vanilla almond milk
Sweetener, optional (kind of depends on if your powder powder is sweetened)

1. After brewing the coffee, let it cool, then pour it into an ice cube tray to freeze solid.
2. When ready to make the shake, combine the soyogurt, protein powder, nibs, cacao powder, vanilla extract, almond milk, and sweetener (if using) in the blender and blend.
3. Add previously frozen coffee ice cubes (I used six) and blend until slushy. Enjoy!

Protein breakdown:
Soyogurt - 8 grams
Protein powder - about 19 grams
Cacao nibs and cacao power - about 1 gram total
Almond milk - about .5 grams
For a total of about 28.5 grams of protein, about 285 calories, and around 8.5 grams of fat. That's pretty much better than any vegan protein bar out there! It also costs less than a protein bar and can still be made soy-free if you use something such as rice or coconut yogurt. (Lifetime Life's Basics Plant Protein is soy-free. It's a blend of pea, hemp, rice, and chia... and yet, super tasty!!). I haven't found a single vegan protein bar on the market that is soy-free. Of course, if you use rice or coconut yogurt the protein count will be less, but you can always boost that back up with some tasty hemp seeds (about 5.5 grams per tablespoon).

Ahh. Frosty goodness.

And since it's a "breakfast" shake, you could easy add in such things as a couple tablespoons of oats, or flax, or wheat germ, or a banana to give it a boost. Not to mention... it's already got your coffee blended right in!

Have a great day and don't foget to enter my Second Friday Giveaway! It ends tomorrow at midnight.

Wednesday, May 11, 2011

Second Friday Giveaway Announcement!

Good news, everyone! It's now time to announce my second Friday giveaway! This cookbook is Veganize This! by Jenn Shagrin.

According to Amazon, "Veganize This! shows herbivores and carnivores alike how to turn the delicious dishes from their previous butter- and beef-filled lives into tasty vegan creations that go well beyond the sprouts-and-groats fare often still associated with veganism. For the gastronomist, Chef Jenn’s creations include Jumbo Lump Jack- Fruit Crab Cakes with Spanish Garlic Mayonnaise and Quattro Formaggio White Truffle Macaroni and Cheese. Craving something a little more down-home and comforting? Check out the recipes for DIY Vegan “Doritos®” and Chicken Fried Tofu Steak. With tips and tricks throughout—from making your own mock meats to killer dairy substitutes—Veganize This! is also accompanied by a healthy side dish of sass; Shagrin’s comedienne-by-day humor makes this a read that’s satisfying for the funny bone as well as the belly."

So there you have it! Want to win it? All you have to do is post a comment at the end of this post for one entry. A Facebook or Twitter shoutout gets you one additional entry per shoutout, and if you have a blog and you link back to my blog and this giveaway you can also receive an additional entry. This giveaway ends May 18th at midnight and everyone in the continental U.S. is allowed to enter. There is also still time to enter last week's giveaway as well, though it ends at midnight tonight.

I will say one thing though, the right bottom corner is a little bent because I think it got smushed when I placed it in the bag with the other hardback books. It is brand-new though, and I promise to make up the bent corner with some vegan cookies and nut butters. :)

So let the entering begin!

Are there any dishes you would like to veganize, but haven't yet?

I have a killer dessert pizza that I used to make, but I haven't made it since becoming vegan. I'd also like to make some vegan brownies and I think I have the perfect way to do it. My goal is to put all the other vegan brownies out there to shame! Bwahaha!! I'll probably make some this week or next and share the results with y'all.

Monday, May 9, 2011

Chocolate Chip-Walnut-Banana Pancakes

Oh yeah, I went there!

It was a crazy morning. I woke up at four a.m. for no apparent reason and could not get back to sleep. I laid in bed until 5:15-ish before I finally decided that:

1. I obviously was not going to fall back to sleep
2. I had a very important stats final in about three hours
3. I needed some pancakes if I was going to get through it!

Also, I needed to study... more...  Since I had one very ripe banana and a couple tablespoons of vegan chocolate chips leftover from cookie-baking (as well as over two pounds of some walnuts), I knew they needed to be tossed together in one glorious pancake. Along with these pancakes and a couple cups of coffee with almond milk, I was finally ready to take on my final.

Little known fact: Pancakes make you better at math.

Chocolate Chip-Walnut-Banana Pancakes:
1 c. unbleached, all-purpose flour
1/2 c. whole wheat pastry flour
1 tsp. baking powder
1/2 tsp. cinnamon
1/8 tsp. sea salt
1 1/2 c. unsweetened vanilla almond milk
1 very ripe banana, mashed well
1 Tb. packed brown sugar
1/2 tsp. pure vanilla extract
2 Tb. mini vegan chocolate chips
1/6 c. chopped walnuts (about 2 1/2 Tb.)

1. In a small bowl, combine the flours, baking powder, cinnamon, and salt. Mix with a whisk and set aside.
2. In a medium bowl, combine the almond milk, mashed banana (mash the nanner before adding the milk), brown sugar, and vanilla.
3. Add the wet ingredients to the dry and stir until just combined. Add the chocolate chips and chopped walnuts and stir to mix.
4. In a preheated skillet or griddle sprayed with some nonstick. Cook a couple pancakes at a time. When the pancake is dry around the edges and has bubbles in the middle, flip it once and cook another minute or two until done. Repeat with remaining batter and occasionally respray the skillet with some nonstick. It's best to cook the pancakes over medium heat to prevent them from cooking too fast.

Serve with your choice of stuffs: butter and syrup, nut butter, fresh fruit, powdered sugar, plain, etc. This recipe makes 9-ish pancakes. Per pancake, you get 121 calories, 3.3 g. fat, 3 g. protein, and 8.7% of your calcium RDA.

How did my final go, you ask? Well, about 45 minutes into the final there was a bomb threat. We didn't get an all-clear until the final was almost over (it was a two hour final), so our professor told us we could walk with the grade we had. Luckily for me, this turned out to be a pretty sweet deal. Also, there were no bombs. And I got to go home and sleep. All in all, it was just kind of a weird day!

And don't forget my first Friday Giveaway, only a couple more days to go!

Sunday, May 8, 2011

It Was Cinco de Mayo: Gorditas Zacatecanas!

I know it's a few days past the Fifth of May, but hey, I got a lot of catching up to do! Remember how I once said that I subscribe to a magazine called Saveur? It's a foodie magazine and it is decidely NOT vegan, but I love to veganize recipes. Especially authentic ones. Well, this month's issue featured a spread on authentic Mexican food in honor of Cinco de Mayo, and lucky for me, almost every single one of the recipes was either accidently vegan or super easy to veganize. I had a hard time deciding which recipe to make first (I'm going to make them all!), but since I decided I had an undeniable craving for masa, the Gorditas Zacatencanas (Zacatecas-style Baked Masa Cakes) got made first.

First things first though, I had to make a stop at one of the grocery stores in the area that has a large selection of Hispanic foods. In order to make these, you need a specific kind of corn flour called masa harina. It's real fine, finer than cornmeal. I don't think it's actually that hard to find. Almost every store around here sells it.


Once I had my masa harina, I was ready to make some gorditas! I had made a pot of pinto beans the night before, so all I had to do was pull them out of the fridge. I started with dry beans because they're a million times cheaper! Of course, you can always skip this step, use canned, and go straight to gordita making!

Big Pot o' Pintos:
1 1/2 c. dried pinto beans
2 bay leaves
2 Tb. chopped garlic
2 tsp. cumin
1 1/2 tsp. chili powder
1 tsp. onion powder
1 tsp. garlic powder
2 Tb. fresh lime juice
1 tsp. kosher salt (this is an estimate, it is to taste)

1. To begin, I always do a "quick soak". Rinse the pinto beans a couple times and pick through them to find any bad ones or stones. Add enough water to cover them completely, plus an additional one inch of water on top of them. Cover, bring them to a boil, and boil them for three minutes. Turn off the heat, and let them sit, covered, for at least one hour. Sometimes I let it sit all morning.

2. Once beans have soaked, drain off the soak water and fill with fresh water to cover, plus about one-half to one inch above the bean line. Add the bay leaves, garlic, cumin, chili powder, onion powder, and garlic powder. Bring to a boil, then cover, reduce heat, and simmer for about an hour or until beans are done.

3. Once beans are done, you can drain off some off the excess water, then add the lime juice and the salt to taste. ADD THE ACID AND SALT AT THE END!! Otherwise, your beans will never soften. The beans are now ready to use or to put in the fridge.

Now, let's get to gordita making! These were really tasty, and surprisingly simple and quick to make! However, you may need to add slightly more water to the masa dough. I didn't because I had already rolled them into balls and was lazy, so they crumbled a little on me when I was filling them. However, when they baked the crumbles stayed in place, lol. Next time I make these, I will just roll the dough flat, top one side with bean filling and then fold the other half of the dough on top of it. I'm not gonna worry about pinching them together or rolling them up because they bean filling doesn't ooze out of them. I also used only 1/3 c. of shortening, and I don't recommend that. They need the full 1/2 c. to get them all flakey and delicious.

Gorditas Zacatecanas:
For the bean filling:
3/4 tsp. cumin
1/2 tsp. chili powder
1 tsp. garlic
1/3 c. yellow onion, finely chopped
2 c. cooked pinto beans, drained of excess liquid
1/2 c. water
Kosher salt and pepper to taste

For the gorditas:
2 c. masa harina
1 tsp. kosher salt
1/2 c. unhydrogenated vegetable shortening
1 1/4 (ish) c. water

1. Preheat oven to 400F.

2. Make the bean filling: In a skillet sprayed with some nonstick over medium heat, saute the onions for about three minutes or until softened. Add the cumin, chili powder, and garlic and saute until fragrant, another 1-2 minutes. Add the water and pinto beans. Mash with a fork and cook until thickened, but not dry, about 15-20 minutes. Season to taste with salt and pepper. Turn off heat and set aside.

3. Make the gorditas: In a large bowl, whisk together masa harina and salt; add shortening and 1 1/4 cups water, and stir until dough forms. Divide into eight 2″ balls and flatten each into a 1/4″-thick disk, and place 1 heaping tbsp. bean filling in center. Wrap disk around filling, pinching edges together to seal, then transfer, seam side down, to a parchment paper–lined baking sheet. Bake until golden brown, about 30 minutes.
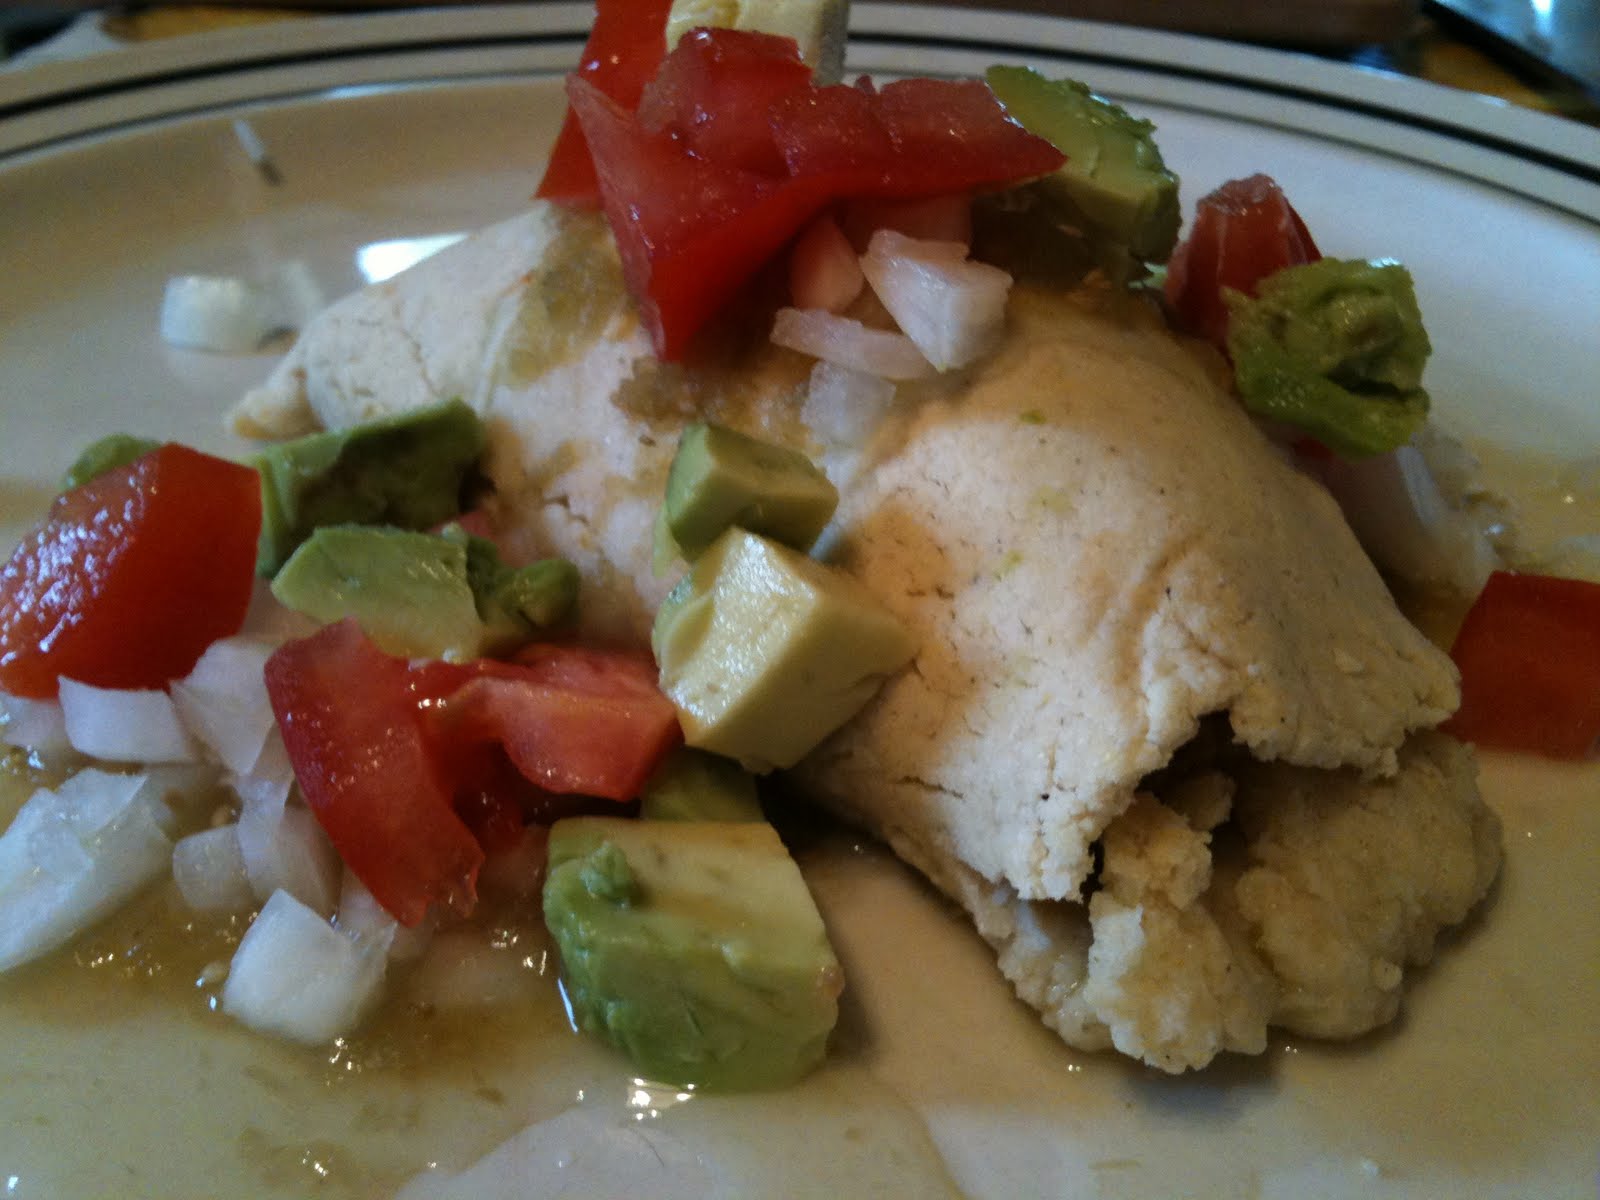
To serve these babies, I topped them with some green salsa, avocado cubes, tomato chunks, and chopped yellow onion.


These were everything I expected them to be, and more! They're kind of like a lazy tamale, so if you are looking to fix a tamale hankering (and you don't want to pay $5 for a certain brand's delicious frozen ones...), I highly recommend this recipe! I will be experimenting with this recipe more in the future. I'm also going to try and figure out how to make mine look like the ones at Saveur's website... Oh, and the salsa I recommend is Herdez's canned green salsa (they also make red if you aren't a fan of green). It's made in Mexico and is fairly cheap. It has like, five ingredients: tomatillos, salt, cilantro, serrano peppers, onions; with no preservatives and no artificial colors or flavors. It is authentically tasty! I don't know how easy it is to find elsewhere, but this too is all over the place here.

Mmmm. Canned salsa.

Now, don't forget! There is still a couple more days before my first Friday Cookbook Giveaway ends! The contest ends Wednesday at midnight!  

Wednesday, May 4, 2011

First Friday Giveaway and Life in the Garden

Ooh. Let's do a garden update! I haven't done one of these in awhile! Lol. It's been a little hectic around here. April wasn't really a good month (it's wasn't that bad, but it wasn't that good, either). There were only a few handfuls of days were the sun even shone, and it was cold, windy, and rainy for almost the entire month. My greens didn't make it, but the tomatoes are still holding on, as well as the bell pepper plants and zucchini. Here's a look at the garden:


As you can see. It's pretty damn big! On the left, those small plants that start at the front are tomatoes (celebrities, juilets), followed by an assortment of peppers in the back (hot bananas, long cayennes, poblanos). Behind my boyfriend is six rows of sweet corn and about four rows of green beans. We also planted some cucumbers in mounds after this shot was taken (small picking cucumbers and tasty eating cucumbers). There is also a row of butter beans on the very left, but they're not above the ground yet. To the left of the tomatoes we're going to plant some Roma tomatoes and eggplant.

On the right, you can see a little plastic container in the front. I have a zucchini plant in there. They're a little tempermental, so they have their own little "greenhouse" for now. I have five zucchini plants total. I have a feeling I'm going to be swimming in zucchini... Also on the right, near the font of the garden you can see potato plants. Most of them are covered in a layer of grass to keep the sun off them. And the back has a row of turnips, kohlrabi (usually a fall plant), radishes, butter lettuce, and a dozen rows of onions; mostly green onions and I think some yellow ones.

We haven't even planted the melons and bell peppers yet!

Once this garden starts producing, I'm going to learn how to can as well. I'm looking forward to that! I'm working on all my homesteading skills, lol.

I was also able to take home my first "harvest" of the season! The turnips needing thinning out, so I was able to take home a whole bag full of baby turnip greens, as well as some green onions.


Beautiful! And since nothing goes better with greens than beans, I made some of that to enjoy for supper that night! I had sauteed greens with garlic and onions and some large butter beans. I'm not gonna lie though, after that picture was taken I doused that plate in hot sauce and more green onions. I'm a fiend for all things onion-y or hot-sauce-like.

Anywho. So that was my garden update! I'm just now starting to get my finals out of the way, so you can except some good ol' fashioned recipe posts soon. I've mostly been eating stir-fries and noodle stuffs because they're quick and easy, although I did make up a batch of my famous Super 'effing Awesome Chocolate Cookies, by request. Oooh! And I discovered the most glorious tofu scramble magic evah! But that's a post in itself! I'm also going to make some Cinco de Mayo deliciousness tomorrow. Since I'm down for all things autentico Mexicano. Luckily, my May issue of Saveur contains some accidently-vegan recipes! 

And one last thing before I bounce out: 
Now that my giveaway has been posted, it is time to begin our First Friday giveaway!

The first book is The Conscious Cook by Hal Ronnen:


In order to qualify to win this book, all you have to do is leave a comment about anything! It could be about cookbooks, gardening, daily life, winning stuff, etc. Just leave a comment! That will get you one entry. To gain another entry you can post an entry about this giveaway on your blog, and then link back to me. To gain a third and fourth entry, you can facebook and/or twitter about it. Since I don't have a facebook or a twitter, I'll just have to take your word for it! Lol. Anywho, the winner will be picked by a random number generator. The deadline to enter is Wednesday, May 11. I know I said it's a "Friday" giveaway, but by making the Friday the midpoint, you get a whole week to remember to enter. :)

The winner will also get some super-awesome, secret, snickety-snacks in their book box! Good luck! Oh, and anyone can enter. You don't have to be a regular reader to get in on this! Have a great afternoon!

Saturday, April 30, 2011

Giveaway Announcement!

Okay, you got me, here it is. My super-awesome, every-Friday-in-May, giveaway!

First Friday:


The Conscious Cook by Tall Ronnen

Second Friday:

Veganize This by Jenn Shagren (ahem, please excuse the Amazon photo...)

Third Friday:

Ani's Raw Food Essentials by Ani Phyo

And the Final Friday:

Twinkie Chan's Crochet Goodies for Fashion Foodies!

Each book will also come with a few vegan snickety-snacks tucked inside!

Details about the book and the giveaway "rules" (if you want to call them that) will be posted each Friday in that giveaway's blog post.

What a better way to celebrate spring than with some new cookbooks?!

Friday, April 22, 2011

Baklava Oatmeal!

Sorry, for the slow posting! It's the end of the semester, and I'm running around like crazy trying to get all my projects / speeches / reports / presentations / tests / homework / extra credit out of the way before finals. Blech. I am so stoked about this semester ending. My super exciting giveaway announcement is coming up soon, I swear! I'm going to have a giveaway every Friday in the month of May, so please stay tuned! I need to take some pictures before I announce just what I got up my sleeve!

Anywho, the other night I was trying to study for my math test, but a certain little dog was extremely bored. After lying all over me, then rolling around on my homework, he finally decided he could get some attention by playing tug-of-war with the clothing I was presently wearing (he also has an affinity for the old-man sweaters I wear). He didn't give up until he got tired! After which he sat next to me and had a snickety snack to recharge. Lol. He's a strange one.  
But speaking of that math test... I was in need of some good brain food before I ventured out into the world. I had just happened to have the makings of baklava on hand, so I decided that some baklava oatmeal was in order! It really turned out perfect and the wholesome goodness was just what I needed to power through my test. I did have to prep this the night before because a little soaking time was required for the figs, but that actually make my morning breakfast making go much quicker. I'm pretty sure you'll love this (and sorry about the icky photo! I use my cell phone, lol)!

Baklava Oatmeal:1/2 c. rolled or old-fashioned oats
1 c. unsweetened almond milk
2 dried figs, chopped
1/2 Tb. raisins
1/4 tsp. vanilla
1/8 tsp. cinnamon
Pinch cardamom
1/2 Tb. agave or honey
2 Tb. chopped mixed nuts (pistachios, walnuts, and almonds are a great combo)

1. In a bowl, combine the oats, almond milk, figs, and raisins. Cover and let sit overnight.

2. The next morning, add the vanilla, cinnamon, and cardamom. Nuke in the microwave 2-4 minutes (depends on your microwave). Stir in the agave and top with chopped nuts. Enjoy!

Wednesday, April 13, 2011

Chickpea and Spinach Soup

Okay, remember how I said I wasn't going to post any more soup recipes for awhile because I was souped out?

Well... I lied.

But this soup was unplanned! I was making a salad the other night, and I reached in the pantry to get a can of what I thought was chickpeas. Turns out it was diced tomatoes. Argh! What am I going to do with an opened can of diced tomatoes?? I just put it in the fridge until I could figure out something to do with it. I also didn't like my salad concoction (it really was a concoction... I won't even tell you what was on it, lol) so I had spare chickpeas and cooked quinoa lying around as well.

Today, with the realization that I'll be out of town for a few days, I was like, "what am I going to do with all these random open ingredients and veggies?!". So, to my chargin, I made soup. Delicious, delicious, soup!

I was able to use up a lot of odds n' ends I had hanging around in a satisfying and nutritious soup. This will definitely be a repeat recipe. It's low in calories, high in vitamin A, and the quinoa helps make it a complete protein. I served it alongside some crusty Italian bread slathered with a little vegan butter. Yummers. Also, it only takes about 20 minutes to cook, and that includes the prep time! This is definitely a quick and easy weeknight meal.

Chickpea and Spinach Soup:
1 (14 oz) can petite diced tomatoes, undrained
1 c. canned chickpeas
1 small yellow onion, finely chopped
4 c. baby spinach, washed
1/2 c. cooked quinoa (or 1/4 c. dry)
1 1/2 tsp. cumin
1 tsp. onion powder
1 tsp. garlic powder
3/4 tsp. coriander
1/2 tsp. turmeric
1/8 tsp. sugar
1/4 c. plain, unsweetened soyogurt
1 c. vegetable broth

1. In a soup pot, saute the onions with a little nonstick over medium-high heat until golden, about 5-7 minutes. Add the cumin, coriander, and turmeric and saute another minute, or until fragrant.
2. Add the vegetable broth, diced tomatoes, quinoa, onion powder, garlic powder, sugar, and an additional one cup of water. Bring to a boil, then reduce heat and simmer, uncovered, about 15 minutes.

3. Stir in the spinach and soyogurt and allow to simmer until the spinach has wilted. Stir thoroughly to blend in the yogurt. Sea salt to taste.

This recipe makes about 4 large servings (about a cup and a half each). For each serving, you get 160 calories, 1.7 grams of fat, 7.7 grams of fiber (whodathunk?), 8.2 grams of protein, 88.9% of your Vitamin A, 29.6% of your Vitamin C, 9.8% of your Calcium, and 13.6% of your Iron (which is aided in absorption by the Vitamin C, yay!).

Also:

Stay turned for a giveaway annoucement!

Tuesday, April 12, 2011

Adventures at Big Lots and Cocoa Banana Muffin Deliciousness

Well, the other day I made a Big Lots stop. I know I've mentioned that place before, but this time I took a few pictures of my adventures. I didn't want to take too many though, I felt a little weird whipping out my phone and taking pictures of boxes in public...

Big Lots contains a wide variety of food. There always seems to be canned organic soups and beans, as well as organic cereals, dry roasted nuts and seeds, and aseptic cartons of veggie broth. You know, some pretty good basics. I've ran into Amy's brand products, Muir Glen brand products, and even all-natural products from Europe like low-sugar black currant jam (yum, by the way). However, we all know that junk food sells, and Big Lots contains their fair share. I randomly picked up a bag of some chocolatey cereal snack mix, flipped it over, and this was what I found:


Could that ingredients list be any longer?! I didn't bother to count, but I can guarentee there is like, three different forms of milk, four different forms of sugar, a medly of partially hydrogenated oils, and no nutrition. Yuck.

The next item I found I almost bought, just because the box is so damn awesome. I get it, they're made from stone-ground wheat, but when you phrase it like this:


They become epic conversation pieces. Haha... Stoner jokes... Anywho, as I'm going through my photos I found that I only took two, so apparently my adventure at Big Lots was a little less adventure and a little more of a... something that isn't quite as big as an adventure. I shall now leave you with a recipe for some super moist and tasty cocoa-banana muffins. Chocolate and banana just belong together, and the little bits of walnuts and chocolate chips make this a decadent muffin.

Cocoa-Banana Muffins:
3 medium, very ripe bananas, mashed
3/4 c. almond milk + 1/2 Tb. lemon juice
3 Tb. neutral-tasting oil (like good ol' vegetable or canola)
1 tsp. vanilla extract
1 1/3 c. unbleached all-purpose flour
1/3 c. whole wheat pastry flour
1/3 c. cocoa powder
3/4 c. brown sugar
2 tsp. baking powder
1/2 tsp. cinnamon
1/2 tsp. baking soda
Scant 1/4 tsp. sea salt
1/4 c. unsweetened, plain soyogurt
1/4 c. walnuts, chopped
1/8 c. mini vegan chocolate chips (I love Enjoy Life brand)
1. Preheat the oven to 350F and prepare a muffin tin for use. I used liners this time because I found some in my cabinet!

2. In a medium bowl, mash the bananas well, until they're mostly pureed. Add the almond milk and lemon juice, stir, then set aside. No use dirtying up a cup, eh?

3. In a large bowl, combine the unbleached AP flour, the whole wheat pastry flour, cocoa powder, baking powder, cinnamon, baking soda, and salt. Mix with a whisk until well-combined.

4. To the bowl with the bananas and almond milk, add the brown sugar, vanilla extract, soyogurt, and oil. Whisk together until combined and then pour the wet ingredients into the dry.

5. Stir the muffin batter until just combined (about 50 strokes), then mix in the chopped walnuts and chocolate chips. If I remember right, this batter is a little thick, so no worries. Fill each muffin cup about 2/3 full and bake and 350F for 20-25 minutes, or until a fork/toothpick comes out clean. Let cool in the tins for a minute or two, and then remove to a wire rack to finish cooling. Or, you could just do what I do and pop them out and let them sit in the tin on their sides. Ye-ah!

This makes 24 regular-sized or 12 large muffins. Also, if you use paper cups and want to eat them hot, they'll stick to the paper. Once they're completely cooled, they won't stick. Now here comes the magic, if you make 24 of these babies, their chocolately, walnutty, banana-y goodness comes out to 104 calories per muffin. As for everything else: 3.4 grams fat, 1.7 grams protein, and not much else! Makes for a tasty snack though!

Sunday, April 10, 2011

This One Night, I Got Fancy... And Made Rice

Yep. I got fancy and I made myself a regular meal with two sides! Normally, I'm pretty busy, so this definitely took a little bit of planning. I made myself some mushroom orzo-rice pilaf, steamed asparagus with vegan butter and lemon juice, and some orange-glazed tofu. However, there were definitely some winners and losers with this dinner.

After all the hard work I put into it, the recipe for the orange-glazed tofu was simply... meh. It had a five star rating (it was previously a chicken recipe), but I think that because it was a glaze and not a marniade, it didn't lend much flavor to the tofu (except on the yummy edges of course, lol). I won't make this particular recipe again, but hey, at least it was a good reminder that I should marniate my tofu for maximum deliciousness.

With the leftovers, I simply sliced them a rolled them up into a wrap with a various assortment of vegetables (including leftover asparagus). They were just meh, too. BBQ sauce helped!

However, the mushroom orzo-rice pilaf was killer. I loved it. This actually wasn't the first time I've made this recipe though. I've made it for my boyfriend before and he likes it as well. It has a great, savory flavor that goes well with a wide variety of dishes. The orzo itself is a small, rice-like pasta that adds a nice texure to dishes. You can usually find it in a small box in the rice and pasta aisle. It can be used for soups, cold grain salads, and hot side dishes, so if you buy a box I promise you find uses for it! Lol.

And, since I've officially made the recipe more than once, I can now put it on my blog (must test and re-test!). So for your side dish enjoyment, I present you with:

Mushroom Orzo-Rice Pilaf:
2 Tb. vegan butter
1/2 c. orzo pasta (check for vegan-ness)
1/2 c. brown rice
1/2 Tb. minced garlic
1 1/2 c. mixed white button and crimini (baby bella) mushrooms, finely chopped
1 c. onion, finely chopped
2 c. veggie broth/water
Sliced, toasted almonds

1. Melt 1 Tb. butter in a skillet over medium-low heat. Cook and stir the brown rice until until golden brown. Stir in onion and mushrooms and cook until onion becomes translucent, about 5-7 minutes. Add garlic and cook for 1 minute more.

2. Add the mushroom-onion-rice mixture to a saucepan and combine with the vegetable broth and/or water. Increase heat to high and bring to a boil. Reduce heat to medium-low, cover, and simmer for about 40 minutes (or until brown rice is with 10 minutes of being fully cooked).

3. Once the rice is pretty much done, melt the rest of the butter in the same skillet. Add the orzo pasta and saute until golden brown over medium low heat.
 Add the orzo to the saucepan with the rice, and allow it to simmer until both the rice and pasta are completely done, about 15 minutes. You may need to add a little more water in order to cook the pasta.

4. Drain off any excess broth (if there is any), then allow it to stand for 5 minutes. Before serving, fluff with a fork and serve with a few sprinkles of toasted almond slices on top.

*OR you could just use white rice and cook the orzo pasta and rice together, in about 20-25 minutes. The only rice I keep in my pantry is brown (love the texture!), so I usually have to modify recipes that call for white.

I'm still gonna keep working on these kind of baked tofu recipes though. They go great with old-fashioned sides like mashed potatoes and gravy and green beans, and I miss that kind of comfort food sometimes.

What type of comfort food to you all enjoy? Like I said, I'm a veggies and potatoes kind of girl. :)
Have a great evening!